
What you need
- Access to the PNETLab GUI.
- An unused interface on the lab node.
- An upstream network that provides DHCP or permits a valid static configuration.
- Permission to attach the lab node to that network.
Cloud0 bridges a node interface to the network used by the PNETLab server's management connection. The outside network must still provide a valid address, gateway, DNS server, and route to the internet.
Add a Cloud0 network to the lab
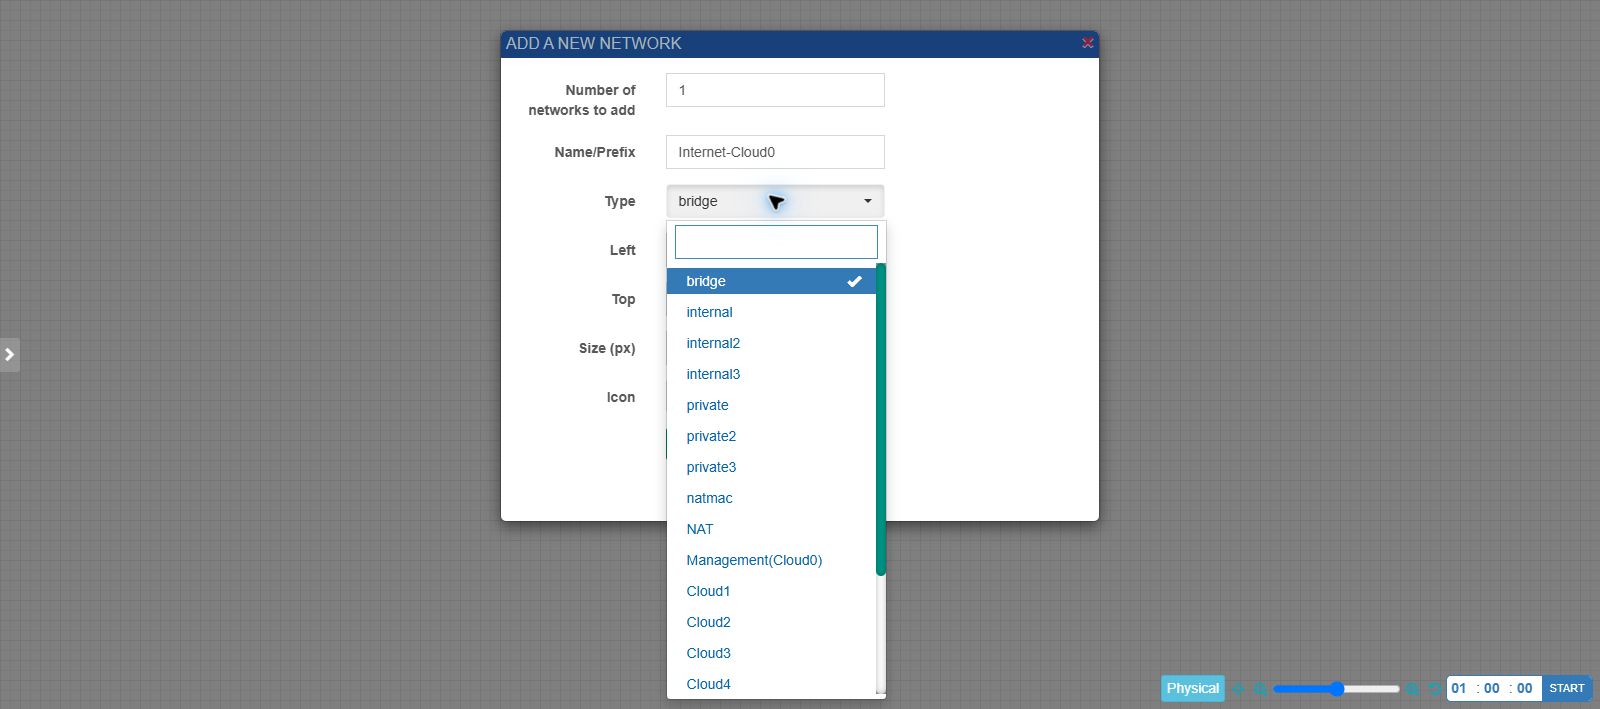
- Right-click an empty area and choose Add an Object → Network.
- Set Name/Prefix to Internet-Cloud0.
- Set Type to Management (Cloud0), then save.
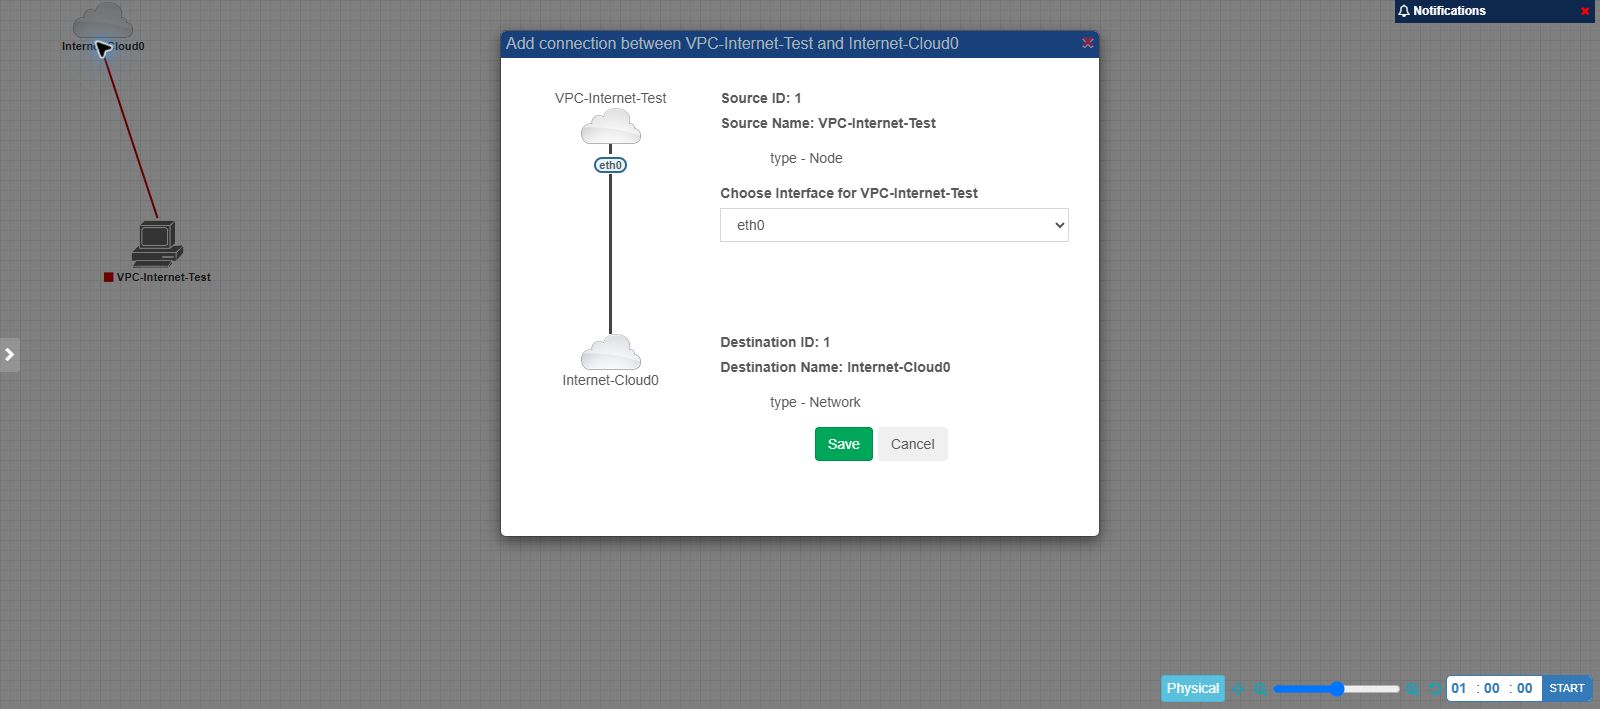
Connect the node to Cloud0
Connect an available interface on the node to Internet-Cloud0. In this example, VPCS eth0 is connected to the Cloud0 network and the node is started.
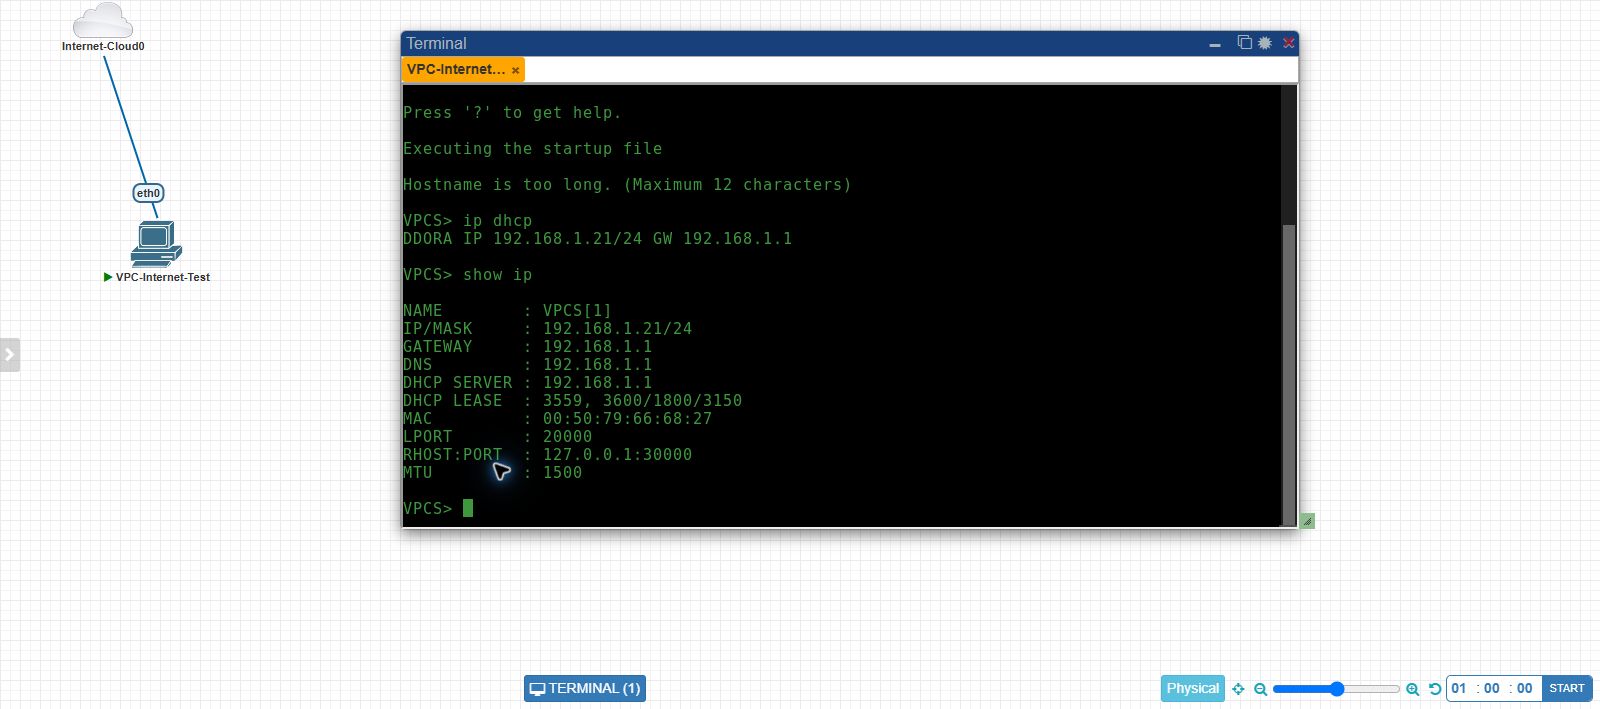
Configure the node interface
VPC> ip dhcp
VPC> show ipDDORA IP 192.168.1.21/24 GW 192.168.1.1 IP/MASK : 192.168.1.21/24 GATEWAY : 192.168.1.1 DNS : 192.168.1.1 DHCP SERVER : 192.168.1.1
The article uses documentation addresses for examples. The live video shows the private addresses assigned by the owner's controlled lab.
Test the connection in the right order
VPC> ping <default-gateway> -c 3
VPC> ping 1.1.1.1 -c 3
VPC> ping cloudflare.com -c 3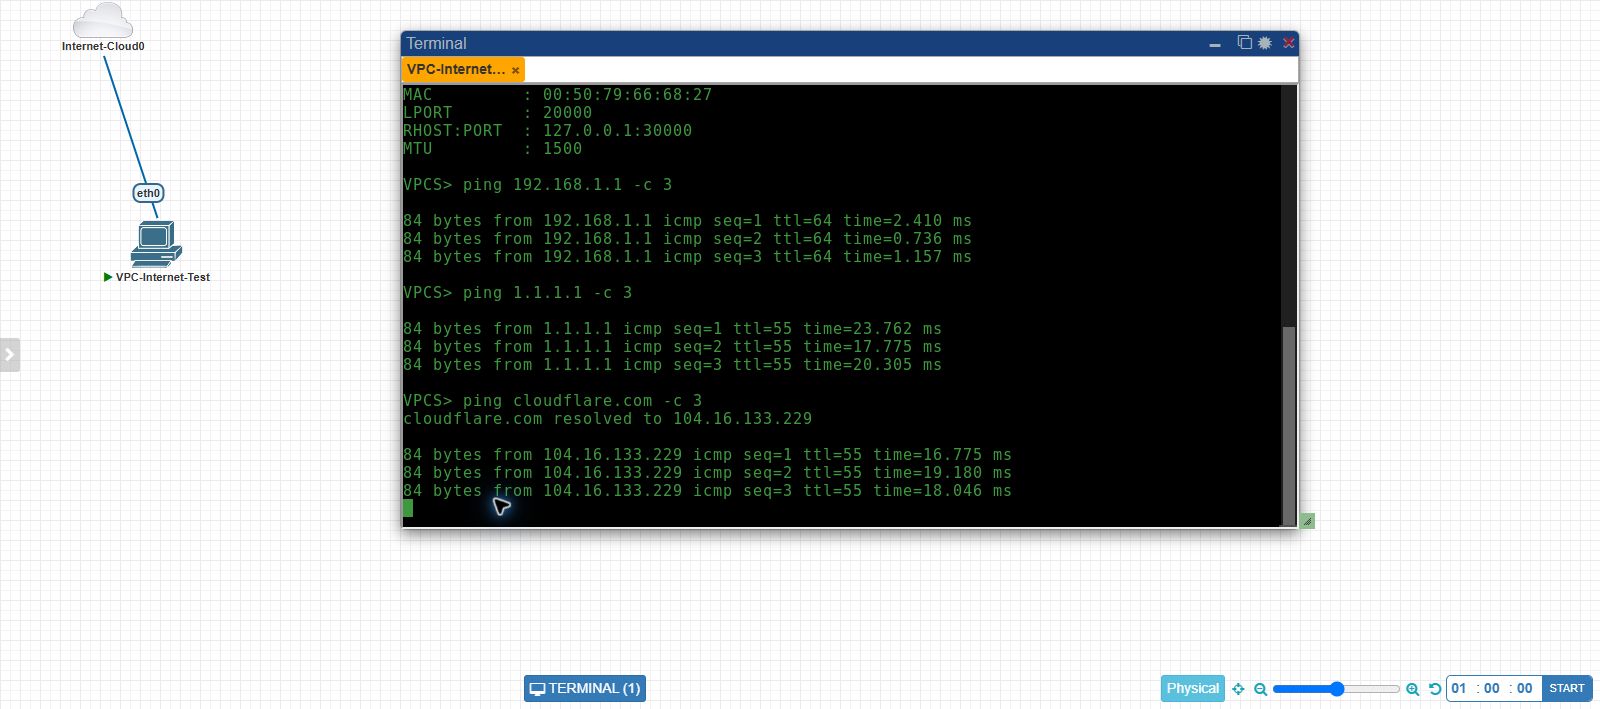
192.168.1.1: 3 of 3 replies
1.1.1.1: 3 of 3 replies
cloudflare.com resolved to 104.16.133.229: 3 of 3 replies
The gateway test proves local reachability, the public-IP test proves internet routing, and the hostname test proves DNS. Every test runs from VPCS, not from the PNETLab host.
If Cloud0 itself is not working
ip -br address show pnet0
ip route show default
bridge link showpnet0 is configured as 192.168.1.252/24, with the default route through 192.168.1.1. The Cloud0 bridge and VPCS path passed the retained live validation.
Lab files and video
The TLB GitHub companion contains the commands and validation output. The companion video follows the same Cloud0 procedure at a natural pace, with centered topology views and enlarged GUI and terminal details.
Explore more blog articles