
- How to prepare PNETLab for scripted access
- Why a dedicated account is safer than an administrator login
- How to test status, stop, and start operations in a controlled order
Welcome to this tutorial on managing nodes in PNETlab! Whether you're a network engineer, a student, or a cybersecurity enthusiast, understanding how to interact with your virtual lab environment programmatically can be extremely useful. In this guide, we'll walk through how to check node status, stop nodes, and start nodes using Python scripts in PNETlab, specifically when running in offline mode.
Prerequisites
- Access to PNETlab: Ensure you have administrative access to your PNETlab instance.
- Scripts: Download the necessary Python scripts from our GitHub repository.
- Python Environment: Make sure you have Python installed on your machine.
Step 1: Set PNETlab to Offline Mode
Before you can run scripts against your PNETlab environment, you need to configure PNETlab for offline mode:
- Log into PNETlab: Open your web browser and log into your PNETlab instance.
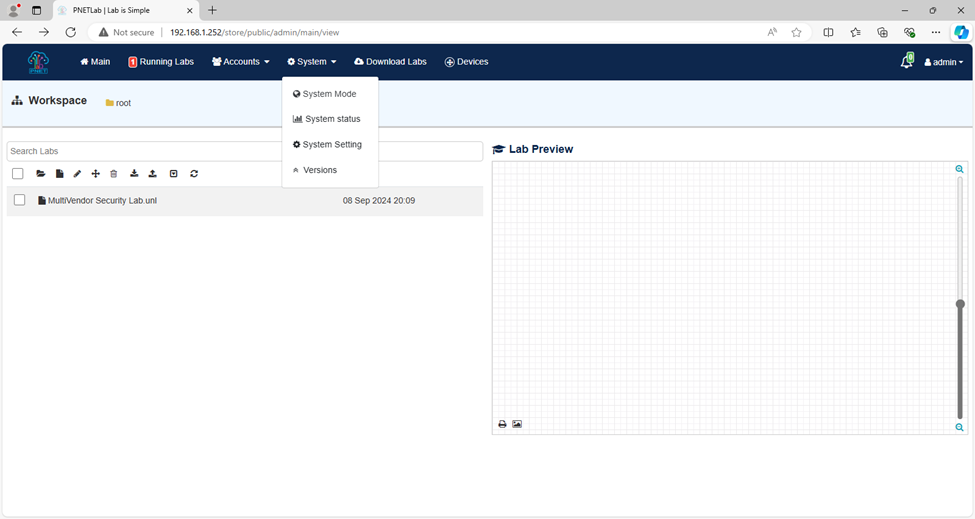
- Navigate to System Settings:
- Click on System in the top menu.
- Go to System Mode.
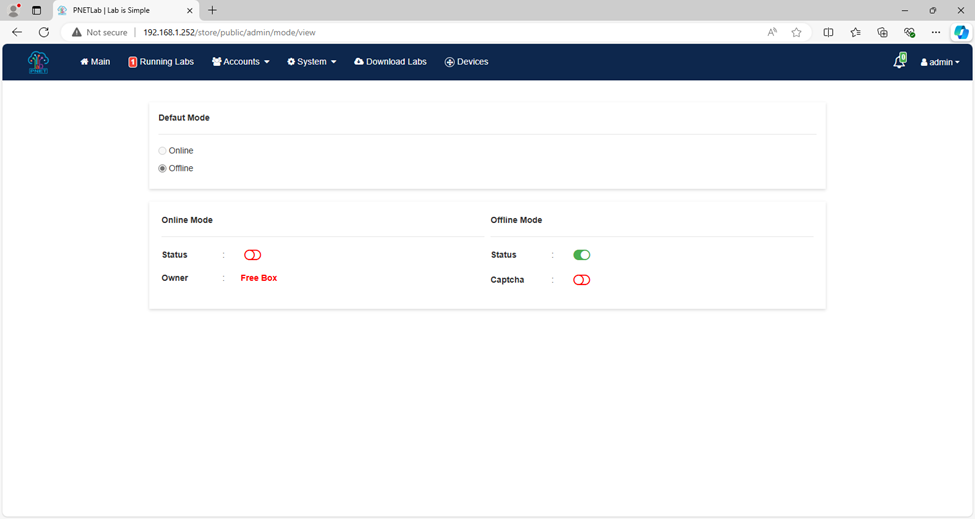
- Disable Captcha:
- Under Offline Mode, ensure Captcha is disabled. This is crucial as Captcha can block script-based interactions with your lab.
Step 2: Create a User for Script Operations
You need a dedicated user account to perform node management tasks. Follow these steps:
- Go to User Management:
- Navigate to Accounts.
- Click on User Management.
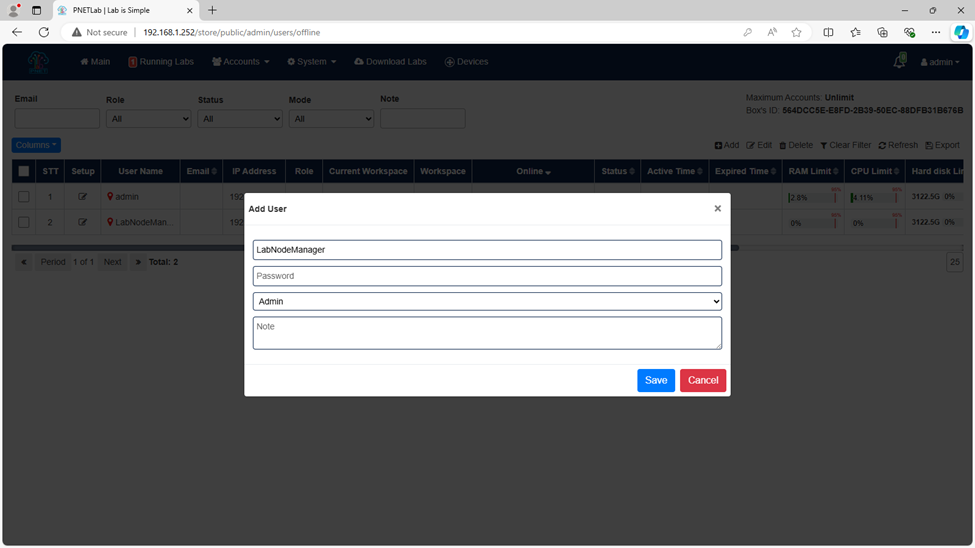
- Add a New User:
- Click Add to create a new user.
- Create a dedicated account such as LabNodeManager. Give it a long, unique password rather than reusing the short credentials found in many lab examples.
- Save the new user account.
Step 3: Download and Configure Scripts
We have provided scripts that will help you manage your nodes. Here’s how to get and configure them:
- Download Scripts:
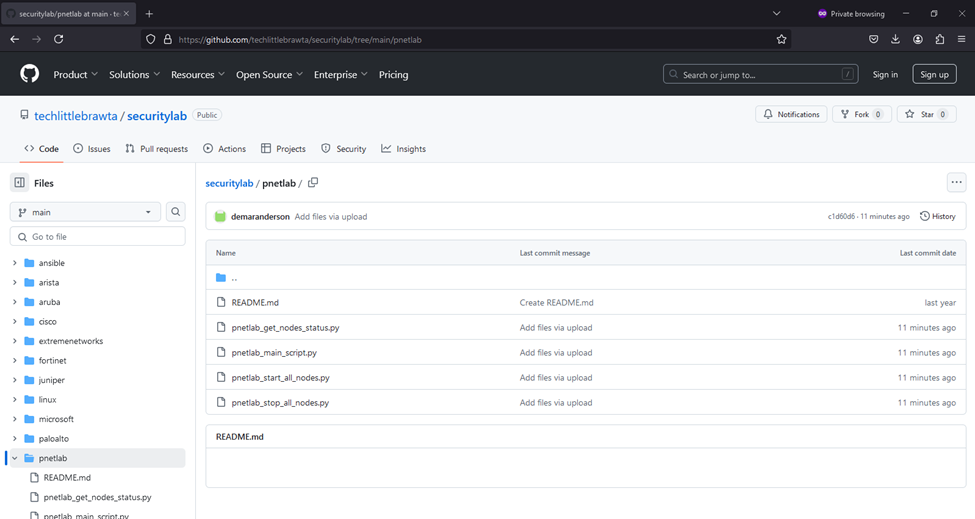
- Visit our GitHub repository: Tech Little Brawta https://github.com/techlittlebrawta/securitylab/tree/main/pnetlab
- Download the pnetlab_main_script.py and any other scripts you need.
- Edit Scripts:
- Open the downloaded scripts in a text editor.
- Modify the base_url, user, and passwd variables to match your PNETlab instance’s IP address, the dedicated username, and its password. Keep credentials and local configuration files out of source control.
- Save the changes to the script.
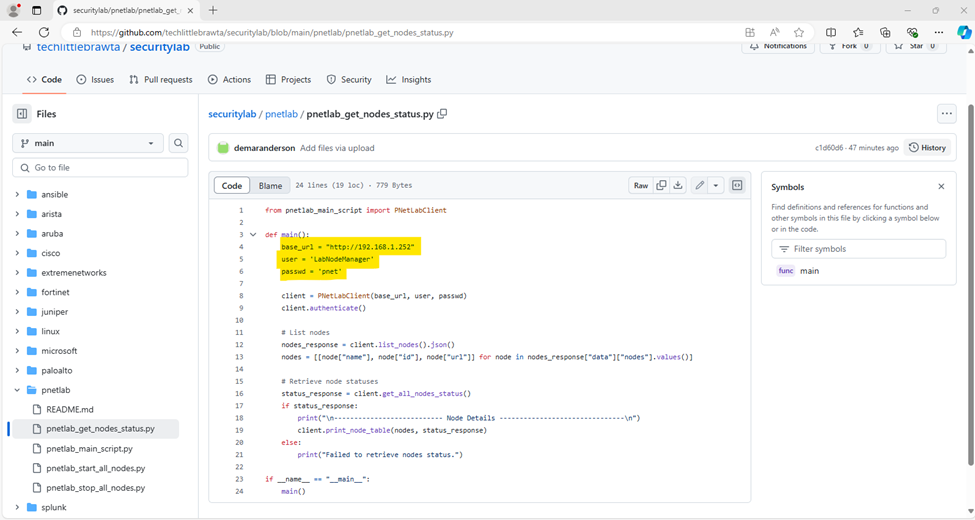
Step 4: Run the Scripts
Depending on the action you want to perform, use the following scripts:
- Check Node Status:
- Run the script that retrieves node statuses to see the current state of all nodes.
- Stop All Nodes:
- Use the script designed to stop all nodes. This will iterate through all nodes and stop those that are currently powered on.
- Start All Nodes:
- Similarly, use the script to start all nodes. This will start nodes that are powered off.
Conclusion
By following these steps, you can effectively manage your nodes in PNETlab using Python scripts. The scripts remove repetitive clicking. Test the status command and one disposable node before controlling a full lab. For more details and additional scripts, check out our GitHub repository.